
Create a New Access Group
Create a New Access Group
-
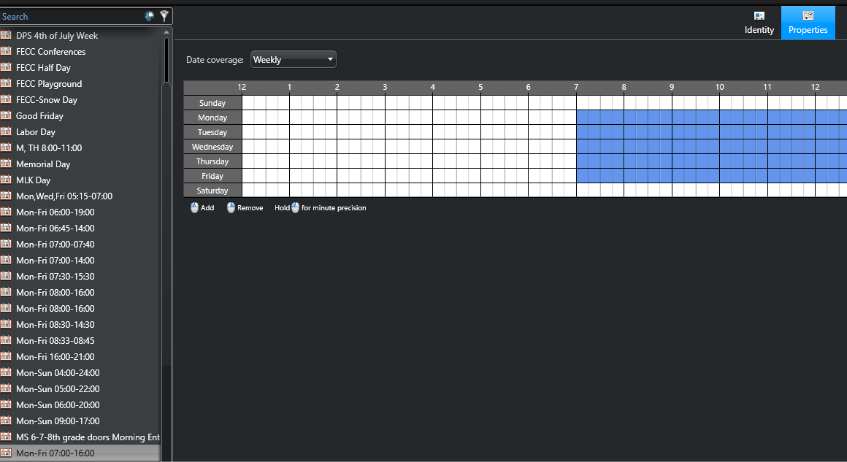
Create a Schedule or Use an Existing Schedule for an Access Rule.
-
(I try to re-use as many time-based schedules as you can. As this could get very confusing and large) – You can make several access rules based on one schedule.
-
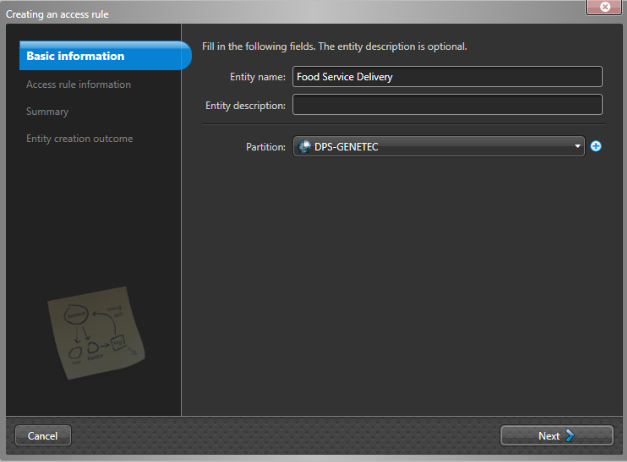
After creating or re-using the Access Rule head over to the Access rules

Click New > Access Rule (You can name it here, I suggest “School Initials – What its for – time ) – Don’t forget to set the Partition to the Correct School, or the people at the school will not be able to see it or use it)
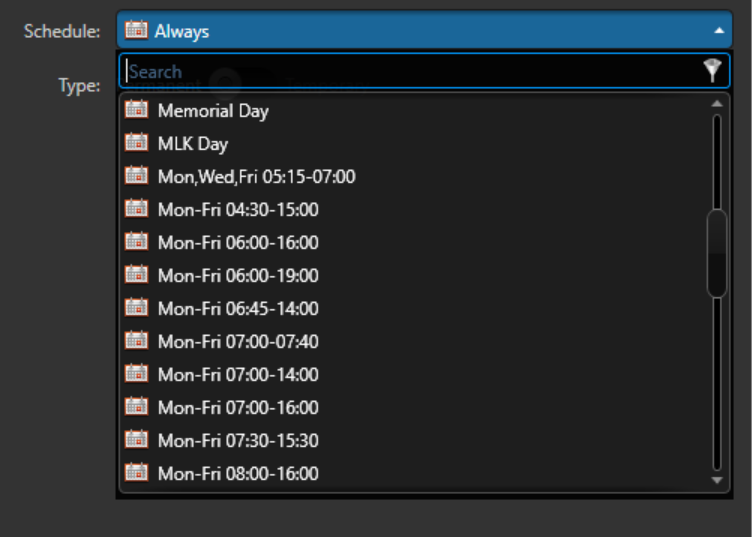
Select the time fame for the Access Rule
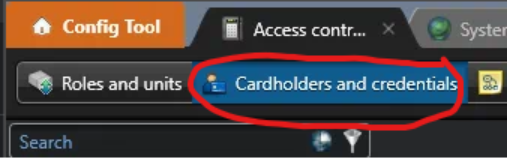
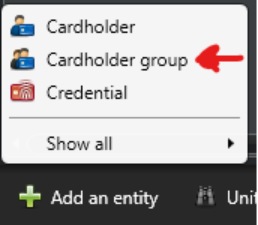
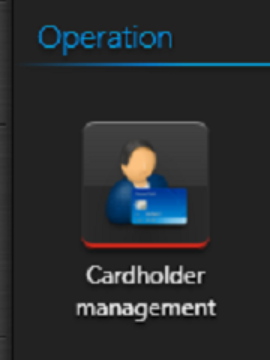
Now click on Access Control > Cardholders and Credentials
At the bottom, click Add an entity > Cardholder Group (you may also use an existing cardholder group) – Label this well, as it will be hard to locate when adding these groups to the cardholder.
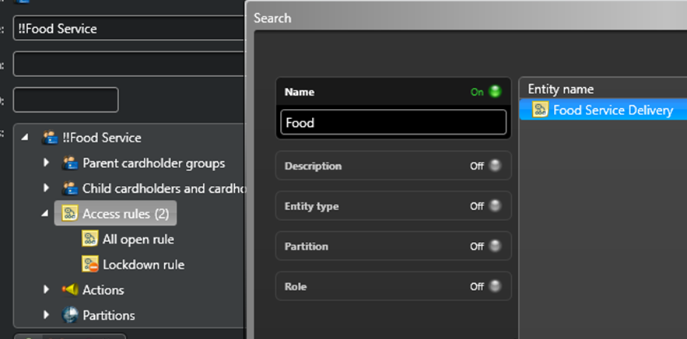
Once you’ve created your cardholder group you will need to apply the access rule.
Click Access Rules and Select the access rule you wish to use.
Now that you have set an access rule to a cardholder group (or single cardholder)
You will need to apply it to the door(s) or areas you wish this group to have access to.
Goto Area View > And find the Door ![]() or Area
or Area ![]() you wish for the rules to apply to.
you wish for the rules to apply to.
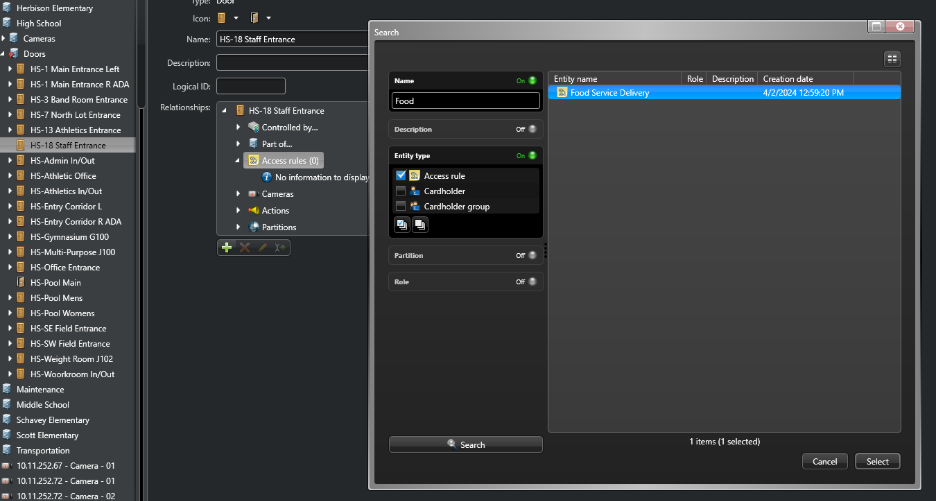
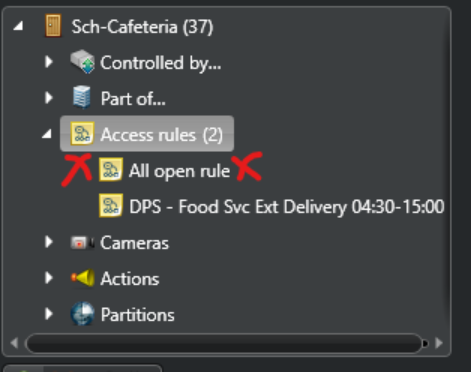
Make sure you remove the “All Open Rule” if there is one. This is applied by default when adding doors.
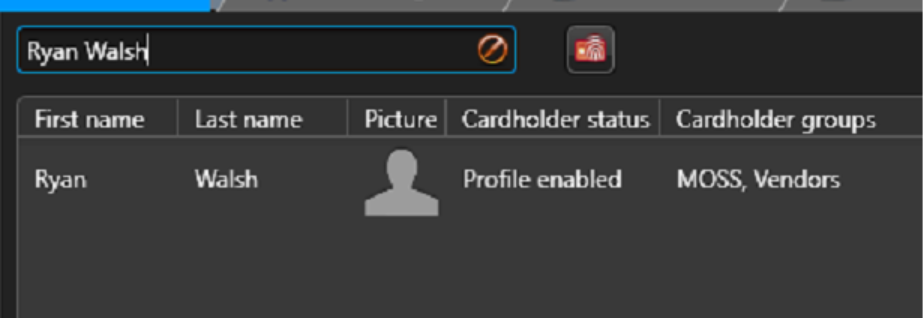
Next we need to apply the groups to the cardholder. This function can be done in Config Tool or Security Desk.
Search for your Cardholder:
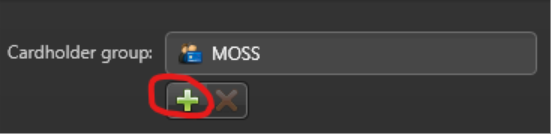
Double Click on the Cardholder, and choose the + sign under the cardholder group:
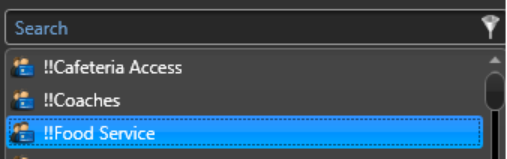
Select your Cardholder Group and Bam! You got it!
No comments to display
No comments to display